Microphones
Mike Gooseneck Microphones:
- 71.98.0093 – Mike PLM 301F – EN | FR | NL | DE | ES | IT
- 71.98.0094 – Mike PLM 401F – EN | FR | NL | DE | ES | IT
- 71.98.0098 – Mike PLM 402F – EN | FR | NL | DE | ES | IT
- 71.98.0095 – Mike PLM 502F – EN | FR | NL | DE | ES | IT
- 71.98.0096 – Mike PLM 602F – EN | FR | NL | DE | ES | IT
- 71.98.0097 – Mike PLM 701F – EN | FR | NL | DE | ES | IT
- 71.98.0099 – Mike PLM 40FF – EN | FR | NL | DE | ES | IT
Mike Low-Profile Microphone:
D-MIC Gooseneck Microphones:
- 71.98.0053 – Confidea D-Mic 30 SL – EN | FR | DE | NL | ES | IT
- 71.98.0054 – Confidea D-Mic 40 SL – EN | FR | DE | NL | ES | IT
- 71.98.0055 – Confidea D-Mic 50 SL – EN | FR | DE | NL | ES | IT
- 71.98.0056 – Confidea D-Mic 60 SL – EN | FR | DE | NL | ES | IT
- 71.98.0057 – Confidea D-Mic 70 SL – EN | FR | DE | NL | ES | IT
- 71.98.0059 – Confidea D-Mic 40 FF – EN | FR | DE | NL | ES | IT
- 71.98.0072 – Confidea D-Mic BC Cardioid – EN | FR | DE | NL | ES | IT
- 71.98.0073 – Confidea D-Mic BC Hypercardioid – EN | FR | DE | NL | ES | IT
Handheld Microphone:
- Microphones: CE Declaration of Conformity – View
Mike Gooseneck Microphones:
- 71.98.0093 – Mike PLM 301F – pdf | dwg | stp
- 71.98.0094 – Mike PLM 401F – pdf | dwg
- 71.98.0095 – Mike PLM 502F – pdf | dwg | stp
- 71.98.0096 – Mike PLM 602F – pdf | dwg | stp
- 71.98.0098 – Mike PLM 402F – pdf | stp
- 71.98.0099 – Mike PLM 40FF – pdf | dwg | stp
Confidea D-MIC Gooseneck Microphones:
- 05.35.9010 – P&L chassis connector → Board2Board
- 04.50.1210 – P&L chassis connector → 6pinsJST (100mm)
- 04.50.1220 – P&L chassis connector → 6pinsJST (200mm)
- 04.50.1230 – P&L chassis connector → WEF (1200mm)
- 04.50.1240 – P&L chassis connector → 6pinsJST (1200mm)
- 04.50.1290 – P&L chassis connector → 6pinsJST (900mm)
Goal
The goal of this process, is to improve the electrical connection quality between the chassis connector and the microphone. This process will remove all flux residue, debris, dust and oxidation/corrosion from the USB connector.
Required Materials
For this process, a contact cleaner is required.
Approved contact cleaners (not limiting list):
- “GOLD G-SERIES”, brand: “Deoxit”
- “CONTACT CLEANER FG”, brand: “Ambersil”
- “Novelec”, brand: “Novatio”
- “Cybersolv 141”, brand: “Kyzen”
Note that the cleaner may not cause corrosion after a period of time (as is the case with e.g. “KONTAKT 60”
Cleaning Process
Step 1:
Use compressed air for 3 seconds to blow all dust/debris out of the connector.
To avoid damage by high pressure, respect a distance of 30 cm min. to the connector.
Step 2:
Apply the ontact cleaner inside the USB connector.
⚠️ Do not use a brush as this may damage the contact!
Step 3:
Use compressed air to speed up the drying process and remove all dust/debris.
To avoid damage by high pressure, respect a distance of 30 cm min. to the connector.
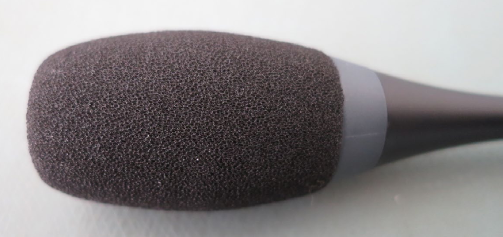
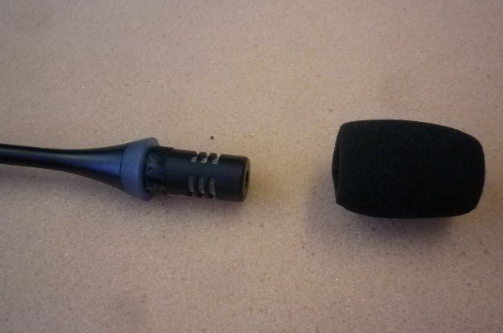
To remove a used or damaged microphone windshield and replace it with a new one, follow the instructions below or download the quick guide here.
Preparation:
- Remove the windshield:
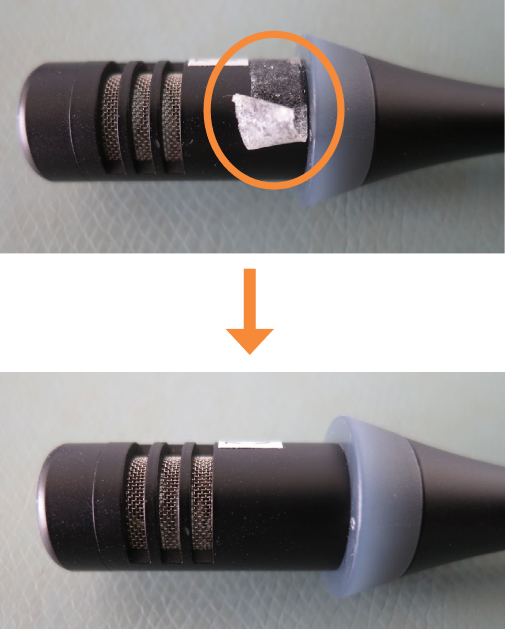
- Remove all residual adhesive residues. It is recommended to use a pH-neutral degreaser made from natural ingredients similar or identical to Metaflux Citrus Reiniger Spray.
Assembly:
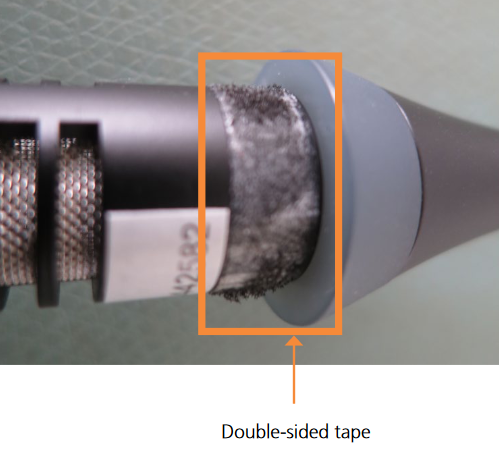
- Glue a strip of double-sided tape on the microphone head just above the LED ring. The tape strip should be 4 cm long and 5-6 mm wide.
Tape reference examples:-
- 3M™ Scotch® ATG Tape 969, 6 mm x 0.13 mm – 33 m 0.005 in. (0.13 mm) thick high-tack adhesive transfer tape. Tape is reverse wound on 1-inch diameter cores for use in Scotch ATG dispensers
- 3M™ VHB™ Adhesive Transfer Tape F9469PC, 6.35 mm x 0.13 mm – 55 m It utilizes the 3M™ High Performance Acrylic Adhesive 100MP, which has excellent long term holding power with much higher adhesion strength than typical pressure sensitive adhesive systems. This 3M™ VHB™ Adhesive Transfer Tape is transparent and is ideal for use in many interior and exterior industrial applications to replace rivets, spot welds, liquid adhesives, and other permanent fasteners.
⚠️ Make sure not to cover any microphone openings with the tape!
-
- Slide the new windshield over the microphone head until the bottom edge fully touches the LED ring, then press the windshield all around over the double-sided tape.