FAQ
To download the Commissioning Checkist document, click here.
- 05.35.9010 – P&L chassis connector → Board2Board
- 04.50.1210 – P&L chassis connector → 6pinsJST (100mm)
- 04.50.1220 – P&L chassis connector → 6pinsJST (200mm)
- 04.50.1230 – P&L chassis connector → WEF (1200mm)
- 04.50.1240 – P&L chassis connector → 6pinsJST (1200mm)
- 04.50.1290 – P&L chassis connector → 6pinsJST (900mm)
Goal
The goal of this process, is to improve the electrical connection quality between the chassis connector and the microphone. This process will remove all flux residue, debris, dust and oxidation/corrosion from the USB connector.
Required Materials
For this process, a contact cleaner is required.
Approved contact cleaners (not limiting list):
- “GOLD G-SERIES”, brand: “Deoxit”
- “CONTACT CLEANER FG”, brand: “Ambersil”
- “Novelec”, brand: “Novatio”
- “Cybersolv 141”, brand: “Kyzen”
Note that the cleaner may not cause corrosion after a period of time (as is the case with e.g. “KONTAKT 60”
Cleaning Process
Step 1:
Use compressed air for 3 seconds to blow all dust/debris out of the connector.
To avoid damage by high pressure, respect a distance of 30 cm min. to the connector.
Step 2:
Apply the ontact cleaner inside the USB connector.
⚠️ Do not use a brush as this may damage the contact!
Step 3:
Use compressed air to speed up the drying process and remove all dust/debris.
To avoid damage by high pressure, respect a distance of 30 cm min. to the connector.
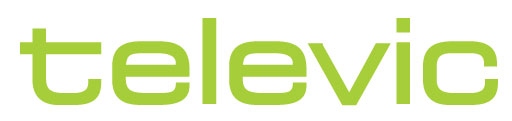
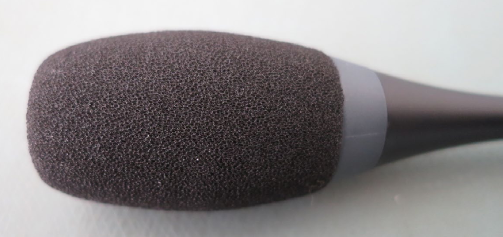
To remove a used or damaged microphone windshield and replace it with a new one, follow the instructions below or download the quick guide here.
Preparation:
- Remove the windshield:
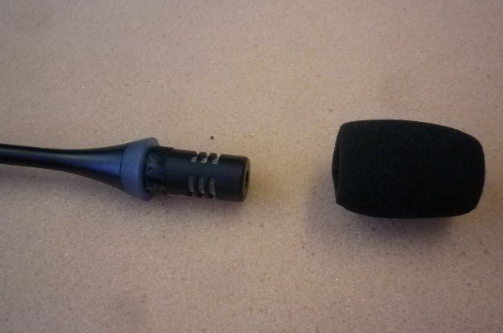
- Remove all residual adhesive residues. It is recommended to use a pH-neutral degreaser made from natural ingredients similar or identical to Metaflux Citrus Reiniger Spray.
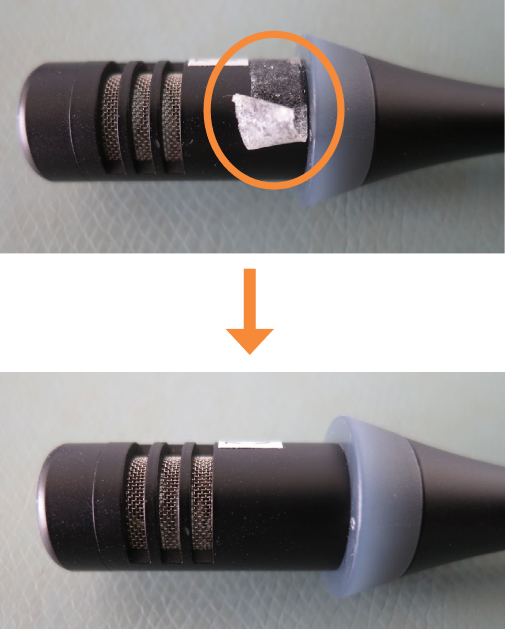
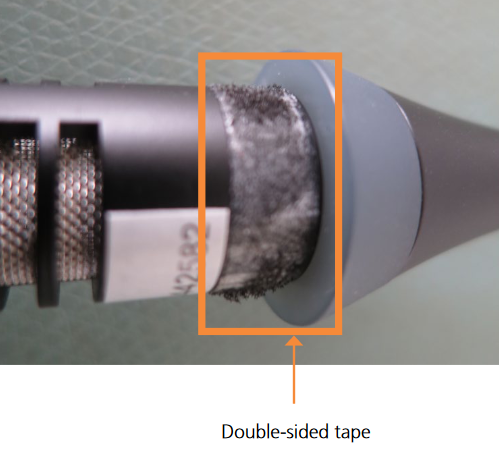
Assembly:
- Glue a strip of double-sided tape on the microphone head just above the LED ring. The tape strip should be 4 cm long and 5-6 mm wide.
Tape reference examples:-
- 3M™ Scotch® ATG Tape 969, 6 mm x 0.13 mm – 33 m 0.005 in. (0.13 mm) thick high-tack adhesive transfer tape. Tape is reverse wound on 1-inch diameter cores for use in Scotch ATG dispensers
- 3M™ VHB™ Adhesive Transfer Tape F9469PC, 6.35 mm x 0.13 mm – 55 m It utilizes the 3M™ High Performance Acrylic Adhesive 100MP, which has excellent long term holding power with much higher adhesion strength than typical pressure sensitive adhesive systems. This 3M™ VHB™ Adhesive Transfer Tape is transparent and is ideal for use in many interior and exterior industrial applications to replace rivets, spot welds, liquid adhesives, and other permanent fasteners.
⚠️ Make sure not to cover any microphone openings with the tape!
-
- Slide the new windshield over the microphone head until the bottom edge fully touches the LED ring, then press the windshield all around over the double-sided tape.
The 10 Commandments of Conferencing Cleanliness:
- Power down or disconnect the devices.
- Avoid using harsh cleaning instruments on any device.
- Avoid spraying cleaners directly onto the products. Apply cleaners to a clean soft cloth, then wipe the surface (or use pre-moistened cleaning wipes).
- Use a minimal amount of cleaner – avoid soaking the product.
- If you are cleaning a tabletop device, clean it in its place on the table. Wipe only the surfaces that are typically exposed. Avoid lifting and cleaning the underside or other hidden surfaces.
- If your product has a removable gooseneck microphone, take it off and clean it separately. Avoid the microphone connector at the base during cleaning.
- Exercise extreme caution when cleaning buttons and knobs. Over-saturation of these areas with liquid can impair their functionality.
- Unless specified in the exceptions list below, the following cleaning agents can be used: mild soapy water (such as liquid dish soap), which is then removed with a clean, damp cloth.
- Exceptions:
- If your product is wired, avoid cleaning the cable with isopropyl alcohol as it may become brittle over time.
- If you’re not sure of the product used, apply it to a small spot first.
- If your product has a microphone or speaker with a perforated surface, it is more susceptible to liquid ingress. In this case, clean with isopropyl alcohol only, as it evaporates quickly. Apply isopropyl alcohol to a clean, soft cloth, and wipe the surface. Do not apply liquid directly onto the product.
- Once the external surface cleaning is complete, pat dry with a soft cloth.
General Information:
We offer two types of releases to support different customer needs:
- Recommended Version – Our most stable and trusted release, optimized for everyday use.
- Latest Version – Our newest release with the latest features and innovations.
We recognize that our customers use our software in different ways. Some prefer the most stable and proven setup for daily operations, while others need access to the latest innovations. By offering both versions, you can choose the balance between reliability and innovation that best fits your needs.
For the majority of users, we recommend choosing the Recommended Version to ensure the most reliable experience for day-to-day operations. Choose the Latest Version if you need immediate access to new features or want to explore the newest capabilities.
If you’re unsure which version best fits your needs, our Support Team will be happy to guide you.
Recommended Version:
The Recommended Version is our most stable and trusted release, proven in the field by customers worldwide. It includes all key platform features and is thoroughly tested for dependable, day-to-day performance.
The Recommended version of the software will typically not introduce new functionality. Changes to the Recommended version only focus on blocking bugs and security fixes to the system to guarantee the stability of the platform.
At certain times, a specific version of the software will be promoted to the Recommended version. This will be one of the existing Latest versions that is selected based on a completed feature set and proven stability in the field by multiple installations.
Yes, the Recommended Version is optimized for production environments and daily operations. It’s actively used by customers across diverse environments.
Latest Version:
The Latest Version gives you access to our newest features and innovations. It’s ideal if you need the latest functionality or want to explore new capabilities.
Yes, each Latest Version release is quality controlled and tested. However, because it’s fresh out of development, it may still include minor issues or evolving functionality.
We actively invite feedback from Latest Version users to help us refine and enhance the experience. You can provide this feedback through the standard support channels available to you.
Implementation and Rollout:
This new release model will start immediately (September 2025) and will gradually be applied to all future software versions. The related software update pages will be updated with a version marked as Recommended and Latest when new releases are introduced.
Yes, over time we’ll roll out this approach across all supported software versions.
Refer to this document:
Support and Resources:
You can view all available software releases on our website here:
https://www.televic.com/en/conference/support/software-updates
License request forms are available on our support contact page :
https://www.televic.com/en/conference/support/request-software-license
Our Support Team is ready to help you determine which release version best fits your needs. Contact them at:
https://www.televic.com/en/conference/support/contact-our-support-team#contactsupportteam
Detailed update guidance and version compatibility information is available here on the product pages of the Knowledge Base. You can also check version compatibility information here: